Friday, 31 May 2013

Dry Prawn powder is often served in most of the keralites families. Chutney is called as chamanthi in Malayalam and since it’s in powdered form, the recipe got its name as Chamanthi podi :) it’s very easy to make and its much tasty as well. It helps you in most of the time, if you don’t have anything to cook at your kitchen, as you can have this recipe with chapathi,idli,dosa or even with plain white rice. Its a perfect recipe for Prawn lovers!!


Dry prawns are now available in many super markets, and once you make this powder you could store and serve for about 2 months also. Thanks to my Ammuma for giving me the idea about chemmeen podi as its absolutely from her cookbooks, I tried making it best with as much as taste as she does, but fortunately it came so tasty and my boyfriend just loved it too :)


Ingredients:
  • Coconut-1/2 Cup
  • Garlic-3-4 Nos
  • Cumin Seeds- 1 Tspn
  • Red Chilies- 5 nos
  • Dry Prawn- ½ Cup
  • Small Onion- 3- 4 Nos
  • Curry Leaves-2 Spring
  • Tamarind-small size
  • Salt- To Taste


Method:

  • Dry roast prawns to golden brown and keep aside.
  • Dry roast the coconut, garlic, onion, salt and tamarind and keep aside.
  • Dry roast the cumin seeds, red chilies, curry leaves and keep aside.
  • Let everything gets cooled, and then first grind the roasted red chilies to fine powder,then add all the other roasted ingredients and grind again to fine powder.
  • Store it in air tight container.
Tips:
"While roasting all the ingredients, keep the stove in low flame, else it may turn dark and taste may different.

Adjust your red chilies as per your spice level."

Tuesday, 28 May 2013

“Oats” many of us, doesn’t like it as much as other breakfast, even I am one among them, before knowing the nutritious benefits in it. Oats are grains from a cereal plant and once harvested, go through a milling process. In order to retain the valuable nutrients in oats, processors set out to preserve as much of the oat grain as possible. The mill removes only the outer inedible shell, known as the hull - virtually guaranteeing you get all the goodness of wholegrain no matter what form you eat oats in. Once milled, oats are steamed, heated and cooled in a kiln, which brings out the flavour. The oats are then rolled, cut or ground to produce flakes, oatmeal or flour.


Most people have Oats as breakfast as it may help with weight control. People who eat breakfast regularly are more likely to weigh less than those who skip it. It may also be used in a variety of baked goods, such as oatcakes, oatmeal cookies, but if you don’t like to have the oats in the above forms or if you’re unsure how to include oats into your daily meals, here comes my instant Oats Dosa, you can try this recipe as it tastes like our normal dosa. It’s easy to make as well.

Few Nutritious Facts:

  • Rich in soluble fiber-Oats contain more soluble fibre than any other grain, resulting in slower digestion and an extended sensation of fullness.
  • Lower bad cholesterol- which possibly to reduce the risk of heart disease.
  • High in Proteins
  • Excellent source of carbohydrates which provide calories for energy needs
  • Oats are high in mineral content and also in several vitamins.
  • Contains hundreds of phytochemicals (plant chemicals)-which are thought to reduce a person's risk of getting cancer
 

Ingredients:

  • Oats- 1 Cup
  • Wheat Flour- ½ Cup
  • Rice Flour- ½ Cup
  • Onion- 1 Finely Chopped
  • Ginger- small piece finely chopped
  • Green Chilies- 3 Nos
  • Pepper Seeds- few
  • Cumin Seeds- 1 Tspn
  • Salt- To Taste
  • Curry Leaves- Few
  • Oil
  • Water

Method:


  • Mix all the ingredients and make a thin batter(like dosa batter) except onion.
  • Fry the onion separately with little oil and transfer the roasted onion to the batter
  • Pour the batter to the dosa pan, and cook flipping both the sides.
 

Tips:

"You can add asafetida to bring extra flavour and taste to the batter.

You could replace the pepper powder with the pepper seeds

Add adequate oil, so that it wont be very dry."


Friday, 24 May 2013

I would definitely say that parotta and chicken salna is a treasure of Tamil Nadu, especially when you travel by road in long nights. You can find lots of parotta shops in the streets busy day and nights. That too, the salna(the chicken curry)served with the parotta tastes heavenly and the combination is incredible it tempts you to have though if you are not hungry.


Making the parotta will be little tedious, as it needs a little effort to bring the rite dough consistency, but if you try often it becomes easy too. I have given few picture to make you more comfortable to do,adding an egg to the dough will make more soft however its optional if you don’t like the egg smell in it.

Ingredients:

  • Maida
  • Salt
  • Sugar
  • Oil
  • Luke Water
  • Egg- 1 (Optional)
Method:
 

  • Make a small well in the flour placed in the wide container
  • Add sugar, salt, egg and water to the flour and mix well
  • Kneed with fingers and form dough like how you make for chappathis.
  • Spread oil to the top of the dough
  • Place a wet muslin cloth and cover the dough with a vessel on top of it and let it for about at least an hour
  • After an hour make small balls out of the dough and spread oil again to top of all the balls.
  • Cover the balls again with the wet muslin cloths and set it for about 15 minutes
  • After 15 minutes, place a thin plastic cover at the base and work with the balls by spreading it evenly with your palm.
  • Flatter it using a rolling pin and hold one end of the dough and stretch the dough by flipping it in the air (If you can do it) else you could just stretch the dough to thin layer.(Make as thin as you can).
  • Do not worry if it gets tears also; now try making some pleates or how you make a paper fan.
  • Roll the pleated dough to wheel shape and keep it separate.
  • After all balls are done in the same way, start one by one pressing gently with the center of your palm, use oil to the dough and flatter it.
  • Repeat the whole process for each ball and store them back under the damp towel.
  • Heat the pan, throw the parottas to it and fry both the sides by flipping it and transfer to a paper towel.
  • After it sets cool, beat the parottas at the sides, like how you to clap to get the layer shape and loosen the texture of it.
 
 
Chicken Salna:

Ingredients:

  • Chicken- ½ Kg
  • Potatoes- 2 Small
  • Onion- 1 Large
  • Tomato- 1 Large
  • Green Chilies- 4 nos
  • Ginger,garlic paste- 1 Tspn
  • Mustard Seeds- few
  • Salt-To Taste
  • Coriander Leaves-Few
  • Curry Leaves-Few
  • Oil
To Grind:
  • Dry red chili- 4
  • Coconut flakes- 2 Tspn
  • Roasted Grams- 2 Tspn
  • Coriander seeds-1 Tspn
  • Fennel Seeds- 1 Tspn
  • Black pepper corns- 1 Tspn
  • Raw rice- 1 Tspn
  • Poppy Seeds- ½ Tspn
  • Cumin seeds- 1 Tspn
  • Cinnamon- 1 small piece
  • Cloves- 3 Nos
  • Cardomon-2 Nos
Method:

  • Roast and grind all the ingredients under “To grind” to fine powder and keep aside.
  • Bake the potato pieces separately and keep aside.
  • In a hot pan,add oil when it heats up,add mustard seeds, curry leaves and add onion and sauté until it becomes soft.
  • Add green chilies, ginger garlic paste,baked potato pieces and tomato and sauté again.
  • Add the chicken pieces to it and sauté well with all other ingredients.
  • When the chicken pieces releases water, add the grounded powder and sauté again for about 2 minutes and cook covered until the chicken bakes well.
  • Garnish with coriander leaves.

 
Tips:
"While making Parota, often dip your fingers in oil so that you can work smoothly with the dough

If you don’t want to use potatoes, you could ignore it in chicken salna.

Adjust the level of spices in chicken salna as per your spice level."
Tuesday, 21 May 2013

Here comes the authentic Tamil Nadu favourite cuisine. All time favourite pulikuzhambu. Though you can make lot of different varieties in pulikuzhambu, konda kadalai will be the best among all, as it has both the combination of tamarind and the black chickpea taste in it.If you add roasted brinjal to it,this will enhance the taste and makes the kuzhambu more tasty.This recipe is absolutely spicy goes perfect when served with hot white rice. At most of the Tamil families this kuzhambu often been cooked as its very simple and easy to make as well.

Initially, when I was new to make all these kuzhambu I was not as satisfied as it was not thick, and then got to know the way about it and now kuzhambu becomes famous in my Kitchen nowadays. The most happiest part in cooking this is, when you are making this curry, there is no side dish is required and just the pappad will be the best to serve with lol :P


Ingredients:
  • Tamarind Extract (thick)- 1 Cup
  • Black Chickpeas- half cup
  • Chili Powder- 1 Tspn
  • Turmeric Powder- ¼ Tspn
  • Coriander Powder- 1 Tspn
  • Garlic- 4-5 Pods
  • Small Onions- 5 Nos
  • Tomato- 1 Large
  • Green Chilies- 2 Nos
  • Brinjal- 3 Small (Cut into lengthy wise)
  • Fenugreek Seeds-1/2 Tspn
  • Mustard Seeds-1 Tspn
  • Sesame Oil- 3 Tspn
  • Curry Leaves-Few
  • Salt- To Taste.
  • Coriander Leaves-Few
To Grind:
  • Coconut Shredded- 3 Tspn
  • Small Onion- 2 Nos
  • Cumin Seeds-1/4 Tspn
Method:
  • Keep the tamarind extract aside.
  • Grind all the items under To Grind and keep aside.
  • Pressure cook the soaked chickpeas overnight for 3 whistle and keep aside.
  • In a pan, pour oil,when it heats up,add the fenugreek,mustard seeds and curry leaves.
  • When it splits up, add the onion, garlic and saute well until the onion becomes soft.
  • Add the tomatoes, brinjal and the chickpea to it and saute again.
  • Add the turmeric,chilli,coriander powder and saute again until the masala mix up well with this.
  • Add the ground paste and cook covered for about 2 minutes
  • After the masala smell goes off from it, add the tamarind extract and heat up uncovered until the curry gets thicken.
  • Garnish with coriander leaves and serve hot.


Tips:
"The curry will come out good only if you saute it appropriately after each addition

You could also add some brinjal or potatoes to the curry.

Skipping coconut ground paste if you don’t want the coconut taste in it will still give you good taste."

Friday, 17 May 2013

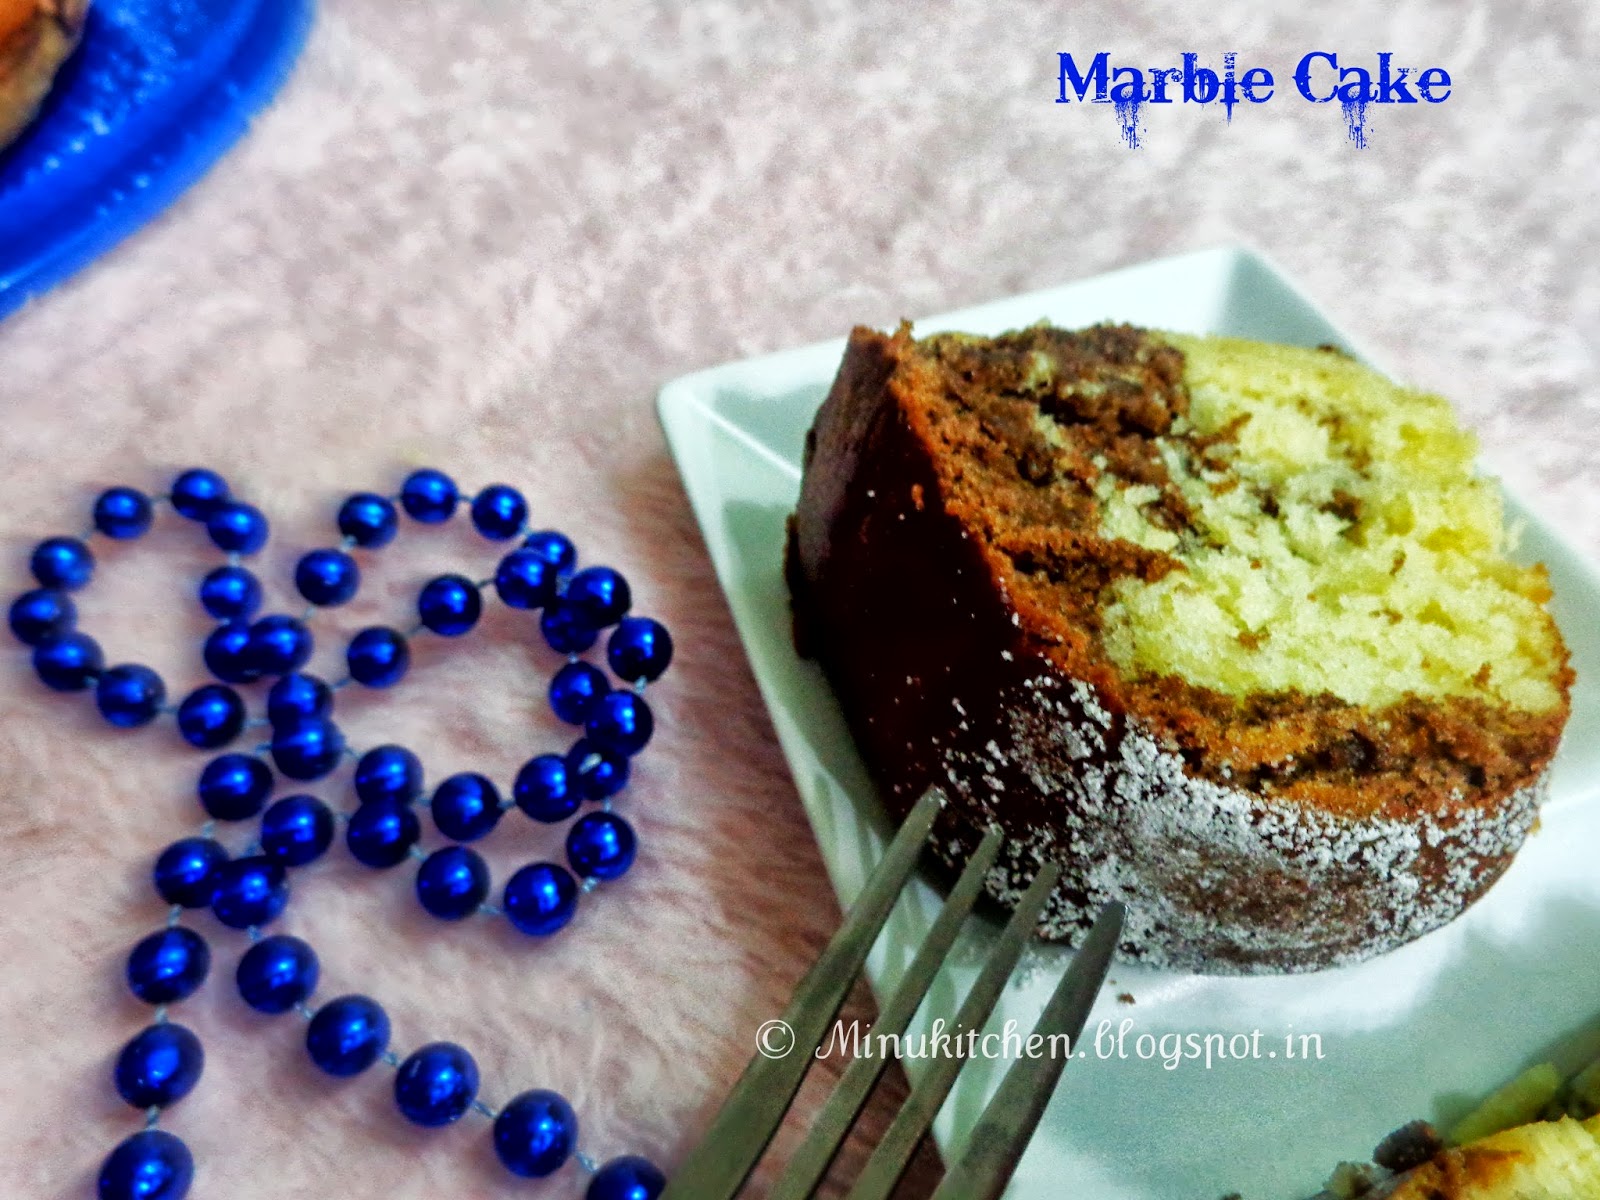
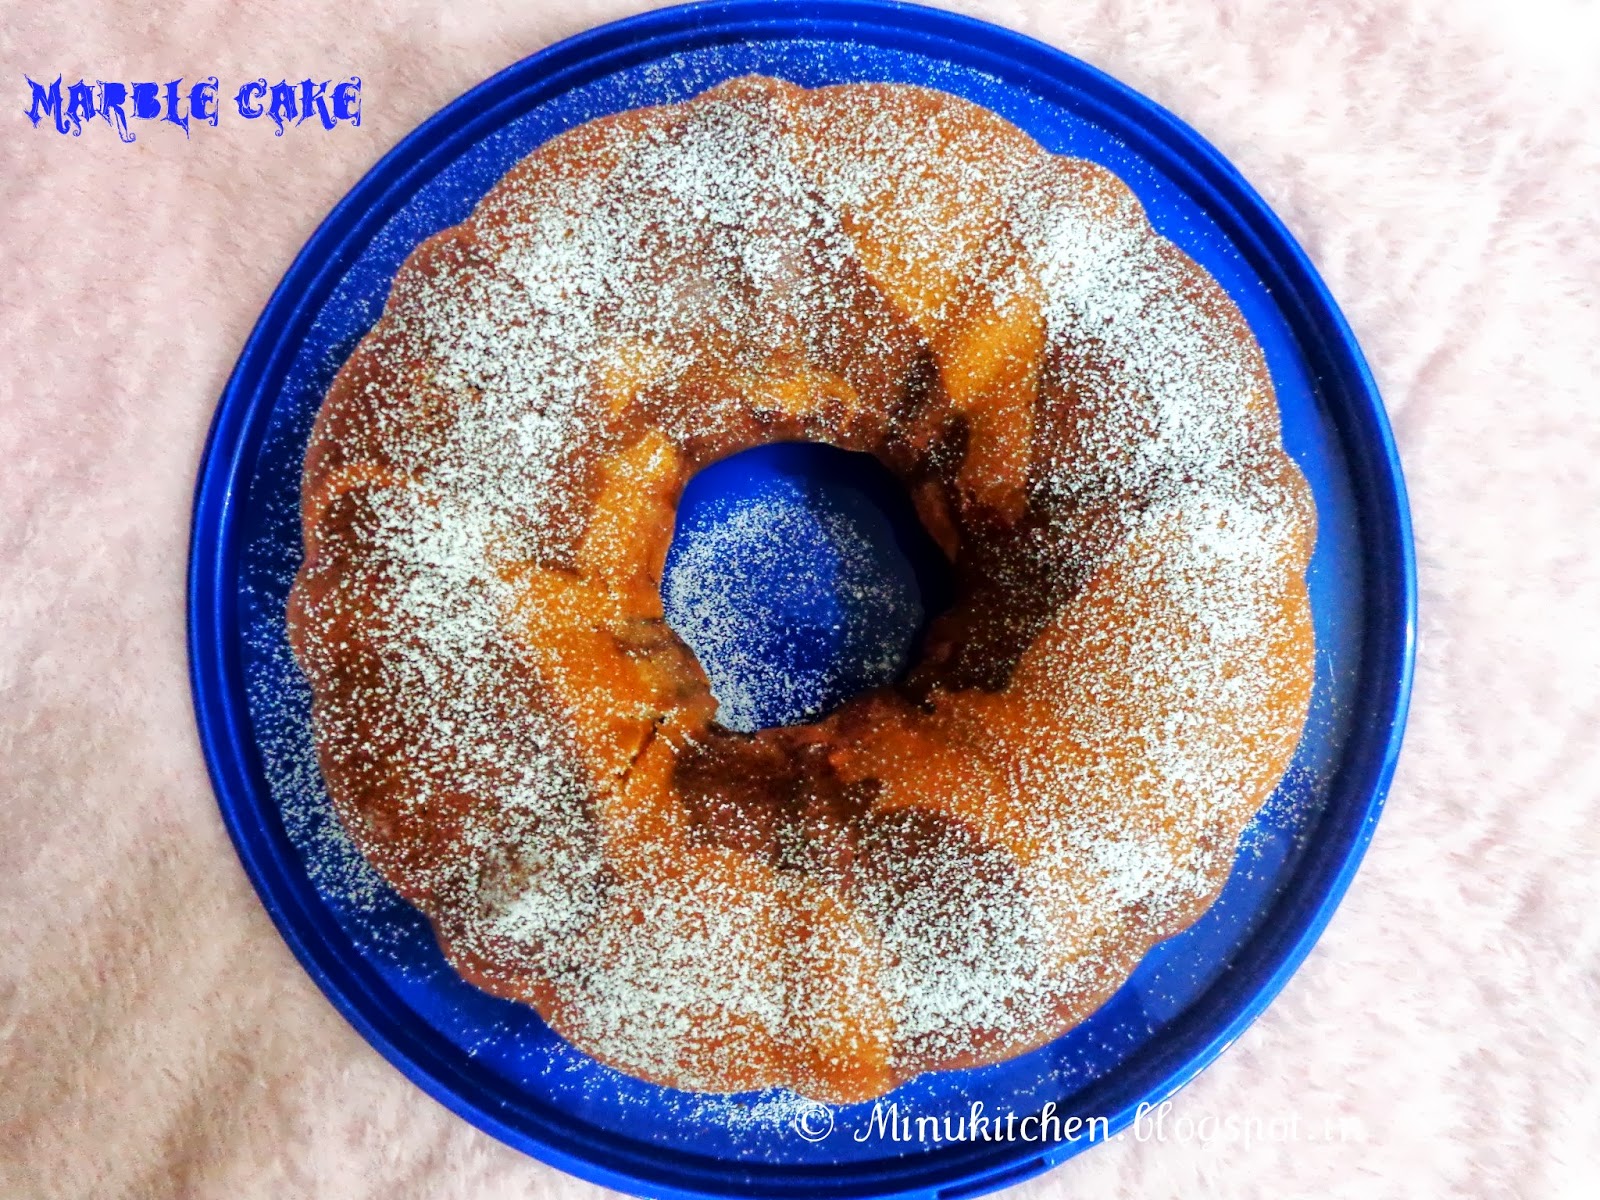
Imagine a cake which has both the chocolate and the vanilla flavor!!! Irresistible is it??? Of coarse yes, especially when you make it for your family and friends to treat them. It’s rich in taste and perfect cake to serve with hot coffee. Before I go into the recipe, thought of sharing you some of the interesting history about this cake, The idea of marbling two different colored batters into a cake originated in nineteenth-century in Germany and it remained popular throughout the 19th and 20th centuries. Originally the cakes were marbled with molasses and spices, later many Jewish in 1970’s added an amount of almond extract to it and named as “German Marble Cake”. Interesting is it!!! So, here you go with the making part.


The most important factor to make this cake is the pan used I.e. a tube pan to bring the shape and its perfect to arrange the batter to differentiate the vanilla and chocolate part in it. It tastes great as we prepare the batter to rise until it becomes fluffier and the unique ingredient used in it is the yogurt. You could replace it by using a sour cream as well. It may look like the method is difficult by seeing, but its absolutely not, and you can make it quite often at home. Marble cakes are served by dusting its top by icing sugar. You can store the cake up to a week for serving as well. When I made this marble cake my BF really enjoyed having it and thanks to my new friend “Irum” for the wonderful feedback and glad that she really liked it. My Best wishes to make her own :)


Ingredients:
  • All purpose flour – 2 Cups
  • Sugar- 1 ¼ Cups
  • Eggs- 2
  • Chocolate powder – 100 Grams
  • Yogurt- ½ Cup
  • Vanilla Extract- 1 Tspn
  • Baking powder- 2 Tspn
  • Baking Soda- ¼ Tspn
  • Butter- 150 Grams
  • Milk- 1/4 Cup
  • Icing Sugar- ¼ Cup
  • Salt-1/4 Tspn


Initial Requirements:
  • Temperature:350 Degrees F(177 Degree C)
  • Time:25- 30 Minutes
  • Pan Used: 10 inch (25 cm) tube pan
Method:


  • In a bowl, mix the all purpose flour, baking Soda, Baking powder and salt and keep aside
  • Stir the chocolate powder with hot water and keep aside(Just to make a chocolate cream)
  • Beat the butter at high speed for about 5 minutes until it becomes fluffy (Step 1)
  • Add sugar to it and beat again in heat speed for about 5 minutes until it becomes as shown (Step 2 & 3)
  • Add one egg at a time and beat at regular intervals until it rises nicely(Step 4)
  • Alternately add the mixed flour mixture,the milk and the yogurt to the batter, in three additions at the beginning and ending with the flour (Step 5)
  • Now, remove half of the batter from it and keep it separate- This is our vanilla Batter (Step 6)
  • In the remaining batter, add the melted chocolate and stir well as shown-This serves our chocolate batter (Step 7)
  • Arrange the batter as shown in the picture, one after the other and once after you are done, with a help of a tooth pick make swirls in the batter just to marbleize it (Step 8 & 9)
  • Set into the oven, after you pick from oven, dust the top of the cake with the icing sugar and serve after it cooled down completely.

Tuesday, 14 May 2013

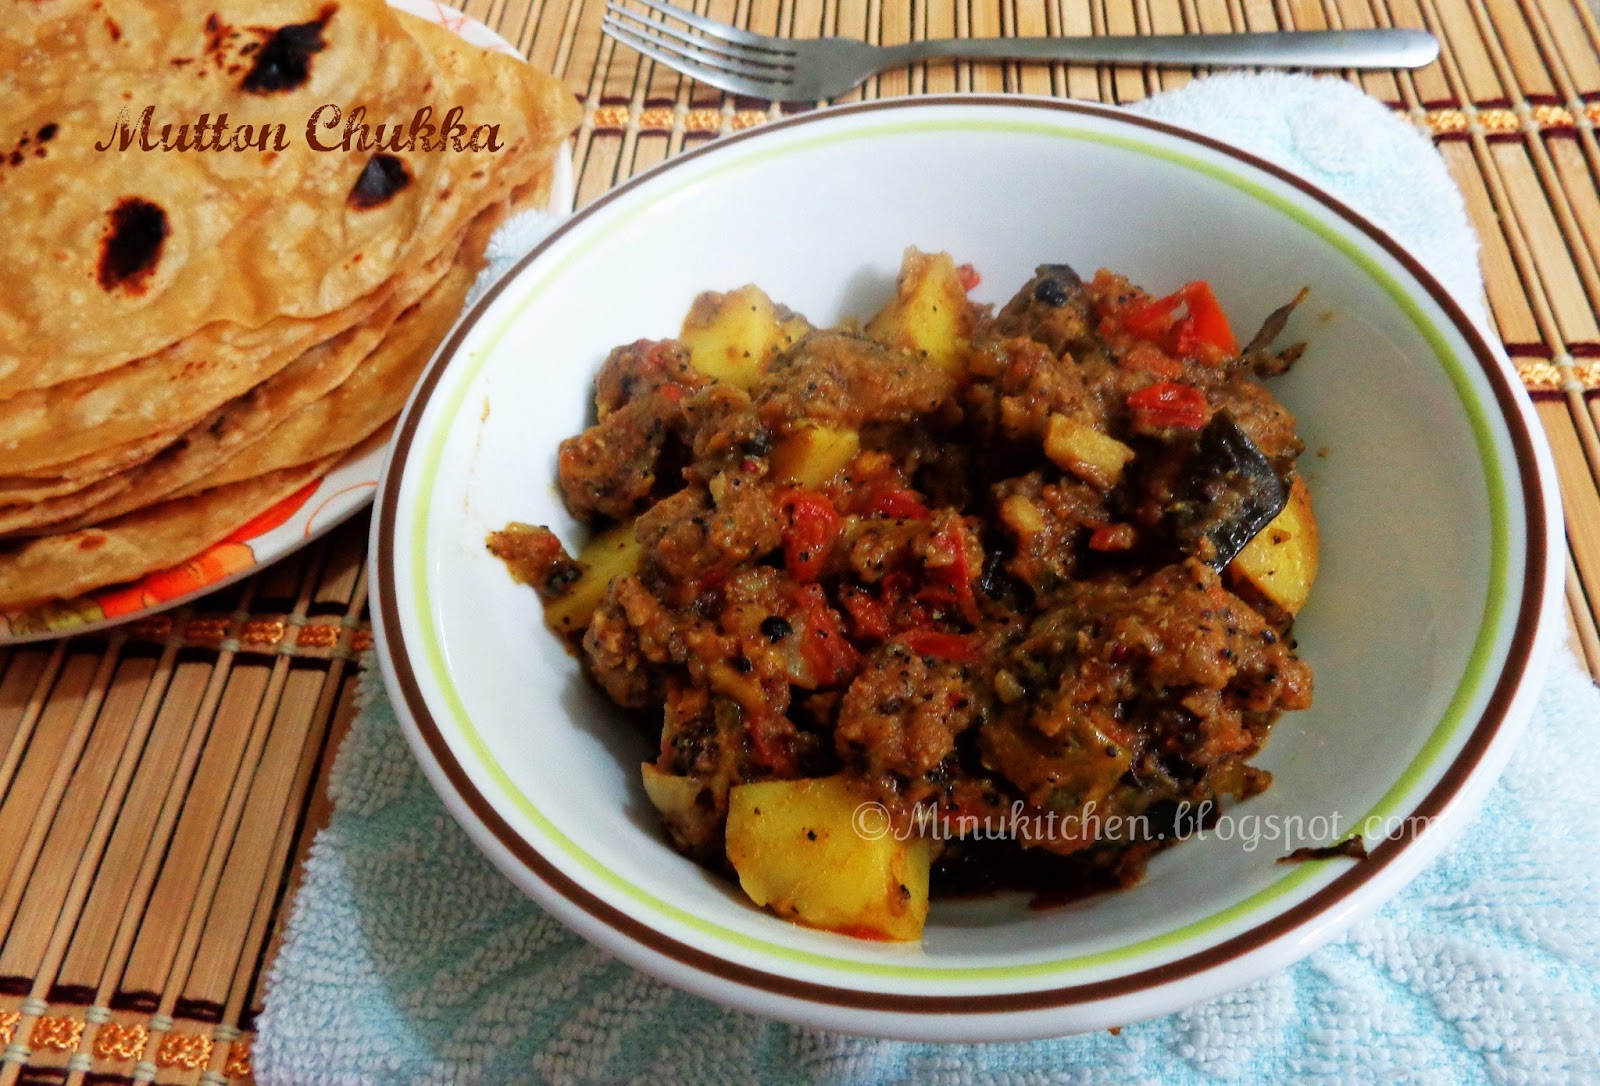
Madurai is one of the place in Tamil nadu which is famous for many things and places however the most important factor you may notice there is the parotta shops opened day and night, there are few restaurants which are very famous like Muniyandi Vilas which serves absolutely tasty mutton chukka and hot parottas. Any one who passes it would definitely stops by the smell it provokes :)

So, here is my Madurai style mutton chukka special for non veg lovers! I would say that its one of an asset of most of the Tamilnadu non vegetarian cuisine and my Achan’s favourite too :) it is similar to how you make a mutton pepper fry. This is rich in spicy and dry as it’s cooked with lot of pepper and garam masala powder, but taste awesome when served with hot rice and Rasam.


Ingredients:
  • Mutton Pieces- ½ Kg
  • Onion- 1 Large
  • Tomato- 1
  • Potato- 1 Large
  • Pepper Powder- 2 Tspn
  • Garam Masala- 1 Tspn
  • Chili Powder- 1 Tspn
  • Turmeric Powder-1/4 Tspn
  • Coriander Powder- 1 Tspn
  • Corriander Leaves- Few
To Temper:
  • Sesame Oil- 2 Tspn
  • Curry Leaves- Few
  • Bay Leaves- 1
  • Fennel Seeds- few
  • Pepper Seeds- 1 Tspn
  • Cloves- 2 or 3 nos
To Crush:
  • Ginger – a small piece
  • Garlic- 4 Nos
  • Green Chilies- 1


Method:

  • Pressure cooker the mutton pieces for 3 whistles along with turmeric powder and salt and keep aside.
  • In a separate pan, pour oil, when it heats up, add the items under “To Temper” and then add the onion, tomato to it and fry until it becomes soft.
  • Add the items under “To Crush” and stir again. Now add the potato pieces to it and mix well with all other ingredients.
  • Add the baked mutton pieces into it and stir well again.
  • Add the chili, pepper, coriander and garam masala into it and stir continuously by keeping the flame low and until the masala smell goes off completely from it.
  • Garnish with few more curry leaves and coriander leaves and serve hot.


Tips:

"You could skip using the sesame oil by replacing it with other oil as well.

Adjust the pepper powder as per your spicy level.

You can skip using potato if you don’t want to use it, however it adds a good taste to the recipe."

Wednesday, 8 May 2013

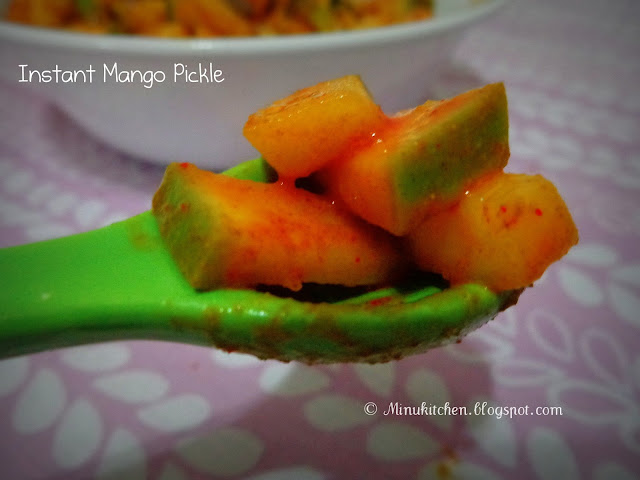
Pickle plays a vital role in most of the homes. I always remember my Amma’s method of doing a pickle like storing it in big jars covered with cotton cloths for couple of days and then preparing it. There is always a traditional method of doing a perfect pickle, most probably done by most of the house wives. However, nowadays everyone prefers to cook fast and tasty foods and to do all those preparation we should spend a long time as well so, here is my instant mango pickle which can be made very easily and its time consuming as well and with regard to the taste yes, it’s obviously great. This is one of my BF’s favourite too. Served best with curd rice.


Ingredients:
  • Raw Mango- 1 (Cut into small pieces)(200 Grams approx)
  • Chili Powder- 2 Tspn
  • Turmeric Powder- ¼ Tspn
  • Asafetida- Half Tspn
  • Gingelly Oil-3 Tspn
  • Mustard- 1 Tspn
  • Salt- To Taste
  • Fenugreek Powder- ½ Tspn


Method:

  • In a pan, cut the mango pieces and marinate with salt and keep aside for about 10 minutes.
  • In a separate frying pan, add the oil, when it heats up add mustard and when it splits up add the fenugreek powder, asafetida, chili and turmeric powder.
  • When it heats up, add the marinated mango pieces to it,while adding the mango you could switch off the stove.
  • After it cooled down completely transfer to a porcelain jar and store for days.


Tips:
"You can add more oil if you want the pickle with a little gravy part in it.

Adjust the chili powder as per your spice level.

Avoid using wet spoons while serving each time as it may spoil the pickle in short period of time."

My all time favourite is Tapioca called as Kappa/Maricheeni in Malayalam and Maravalli Kilangu in Tamil. As already I have given the nutritious facts of tapioca in my Tapioca Sweet pancake post skipping to the recipe.

This is a unique recipe prepared in Tamli nadu and the easiest part in it is doesn’t involves with any grinding part and no extra effort is needed like making the normal vada and it tastes great while chewing it. Here is my marichini vada/Maravalli kilangu vadai for you :)

Ingredients:

  • Tapioca- Half Lb or 1 Small
  • Small Onions(Cut into small pieces)- 10 Nos
  • Green Chillies- 5 Nos
  • Rice Flour- 2 Tspn
  • Besan flour- 1/2 Cup
  • Ginger pieces-Few
  • Curry Leaves- a Bunch
  • Pepper Seeds- 2 Tspn
  • Cumin Seeds- 1 Tspn
  • Asafetida- Half Tspn
  • Salt- To Taste
  • Oil- To Fry


Method:

  • Cut into pieces and wash the tapioca and pressure cook the tapioca for a whistle.(It should be not fully baked)
  • Smash the half baked tapioca and keep aside.
  • Add the cut onions,ginger and green chillies along with other ingredients to the smashed tapioca and mix well.
  • Try making the vada shape and drop slowly into the hot oil.
  • Flip both the sides and set into the paper towel to remove the excess oil in it.


Tips:

"As it does not mixed with any other flours it may not turn out with a good shape.

You can also add few powdered channa dal to the vada to make the vada thicker."


Tapioca should not be over baked, as it may separate from oil when frying it, so baking it just for 5 minutes will suffice.

Friday, 3 May 2013

Without a chicken kebab no BBQ is complete in summer, this recipe would certainly add fun when you plan a BBQ in a hot sunny day in a lake or a park with your family. When I am writing this post I remember our first BBQ fun day after marriage spent in Beaver Lake with lot of friends, games with hot grilled chicken kebab. It has a dual name as many calls it as a Chicken Kabab and some as Chicken Skewers. Perhaps again this is for Rukmani :) as this is her favourite cuisine from me.

It’s a pure non spicy recipe hence it will be served with Mint sauce or tomato sauce.


Ingredients:
  • Chicken – ½ Kg Cut into pieces.
  • Green chilies - 4
  • Ginger – a small piece
  • Garlic - Few
  • Mint leaves - a bunch
  • Coriander leaves - a bunch
  • Half & half milk – ½ Cup
  • Spray Oil
Method:

  • Grind all the ingredients excluding chicken
  • Marinate the chicken pieces with the grounded paste.
  • Add half & half milk and leave it for 4-5 hours or over night in the fridge.
  • Pre heat the oven 400 degrees for 10 mins and pierce the chicken into the skewers and grill it
  • Turn around the chicken for For every 10 mins sprayed with oil.
  • Turn the Oven mode to broil and keep the chicken in it for about 10 minutes.


Mint Sauce:

Ingredients:

  • Mint Leaves- a Bunch
  • Lemon – 2 Squeezed
  • Curd- 3 Tspn
  • Salt-To Taste
  • Ginger- a small piece
  • Cilantro Leaves- half Bunch
Method:
  • Grind all the items except curd and lemon extract.
  • Add the lemon extract followed by curd and stir well.
Tips:
"You can adjust the chilies as per your spicy level.

If you are using the bamboo skewers you may need to soak it atleast for 2 hours."


I would definitely agree that this recipe should not be either in tamil or kerala recipe, however this post is exclusively for Rukmani & Prasanna and Rosy too(My best pals). I am happy to dedicate this post to them. Paneer Butter masala is a rich non spicy authentic north Indian recipe served most often with chappathi or pulka. The beauty of the recipe is it doesn’t need any onion to cook and also its very easy dish to make whenever you feel like treating your vegetarian guests.


All you need is to make a tomato puree and your all done with the process.Home made paneer is best to make as it adds a perfect taste to it.The cream used can be a half and half milk or the whipping cream, If you are cautious about the fat part then you can go ahead and use the half and half as its 12% fat and the whipping cream is 35% fat. So, here you go with the method.

Ingredients:

  • Paneer- 1 Cup(Cubed)
  • Kasoori Methi- ¼ Cup
  • Fresh Cream- ½ Cup
  • Cumin Seeds-1 Tspn
  • Tomato Puree- 2 Cups
  • Chilli Powder- 1 Tspn
  • Coriander Powder- 1 Tspn
  • Ginger garlic paste-1 Tspn
  • Garam Masala- 1 Tspn
  • Salt-To Taste
  • Butter- 2 Tspn
Method:


  • In a hot pan,pout the butter and add the cumin seeds,when it splits up add the ginger garlic paste and saute for 2 minutes.
  • Add the tomato puree to it and add the salt,chili,coriander and garam masala powder and heat up for 2 minutes.
  • When its starts boiling add the fresh paneer and cook covered for about 5 minutes.
  • Cook uncovered for 5 minutes, and when the gravy starts thickening add the kasoori methi leaves and stir again.
  • Just before you switch off the stove add the fresh cream and stir well to combine with the gravy and stop boiling it.


Tips:
"If you don’t want to add butter you can skip it and use any oil.

You can skip using ginger garlic paste if you don’t like to add garlic as well however the taste will not be same as it served in restaurants. "