Showing posts with label Pastries. Show all posts

Tuesday, 11 March 2014

After a long period, I got a little time to spend my time in baking at my kitchen. It’s been really crazy that I am going through in weekends, the 2 days just passes like nothing and again the Monday comes Office :) This weekend I didn’t compromise myself and got into baking something interesting as well as time consuming with help of my Bf. Yes, believe me it’s a very simple cupcake that you could make it in 10 minutes (excluding the baking time). The coconut cup cakes are real sponge in texture and when its filled with the cream, it tastes heavenly that too with the sweetened coconut flakes on the top.

These coconut flakes can be grabbed in baking sections in any grocery stores and this is perfect for making coconut cupcakes or a whole cake, however you can use either the sweetened or unsweetened of your choice. But I love the 1st version as it goes well with this. It doesn’t need any much further decorations as the coconut flakes on top of it says it all. After you make you could store in the refrigerator for couple of days as well. The interesting fact about these cupcakes is its best when served the next day after prepared. Go for it and serve it for your loved ones especially the kids as they really go crazy on cupcakes and in fact “Eating a cupcake brings out the kid in all of us” :)

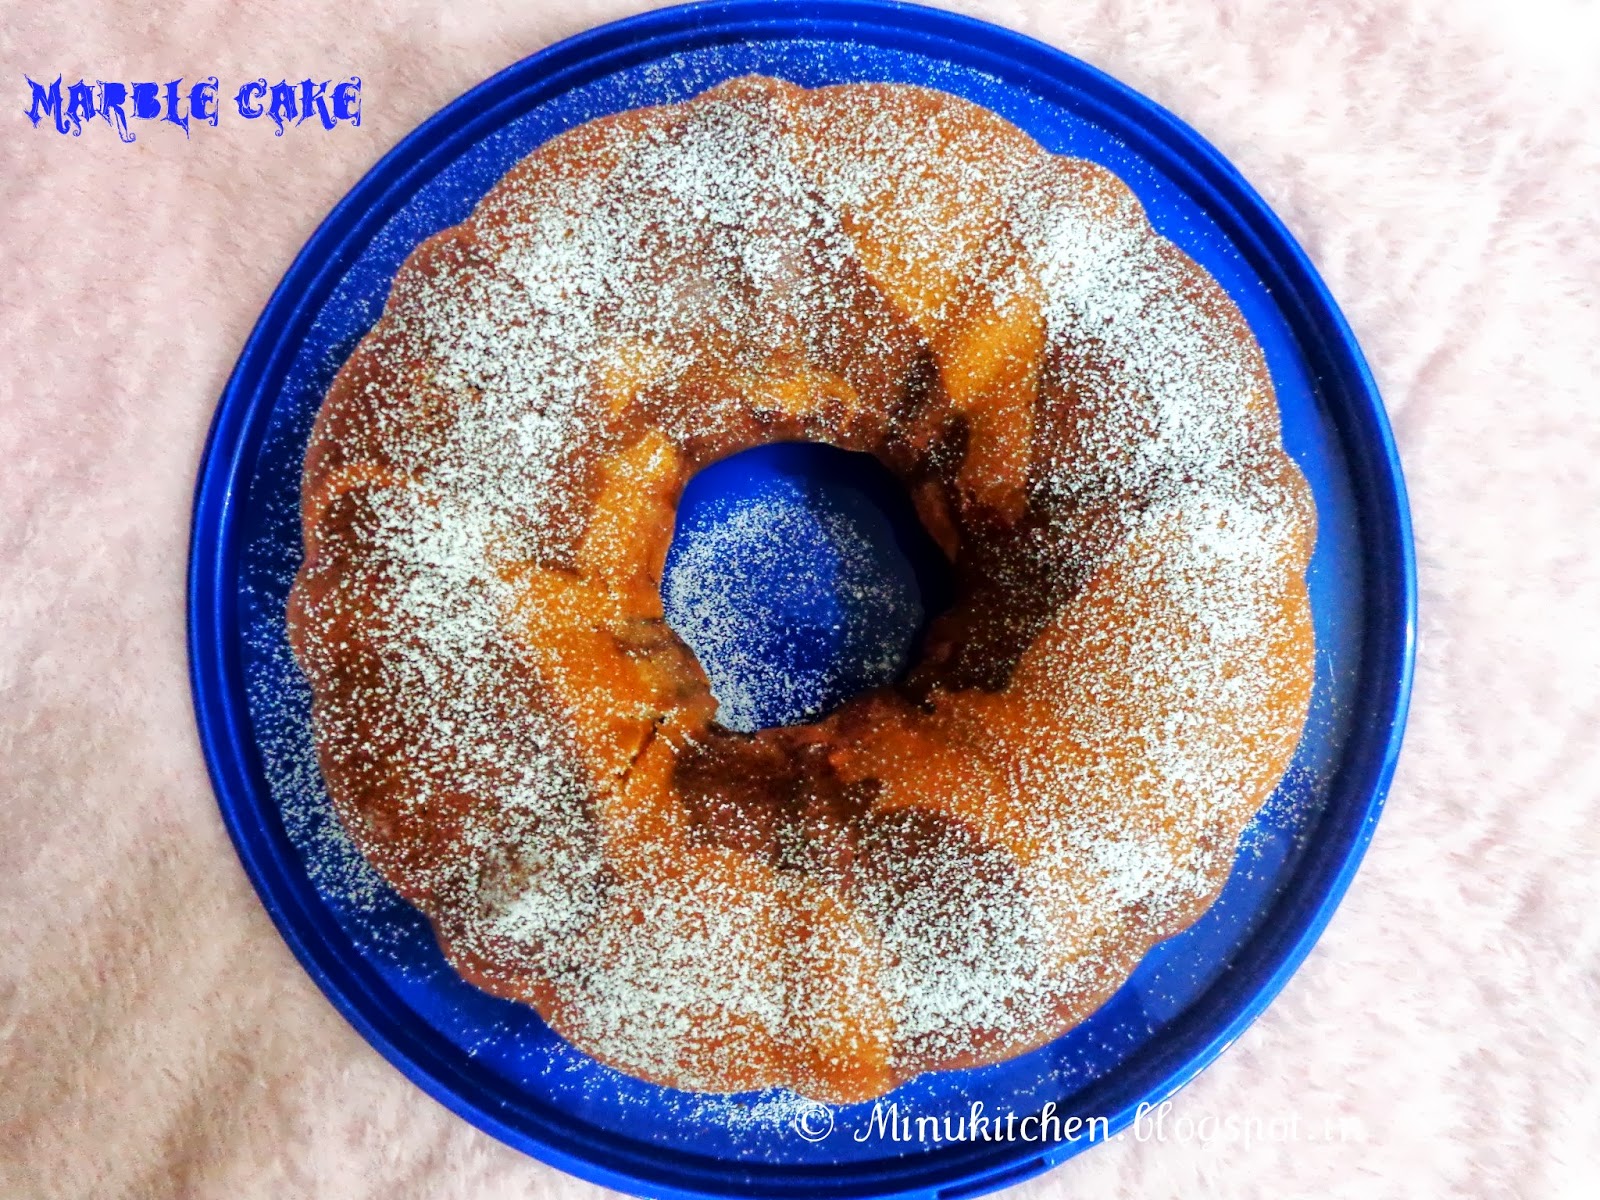
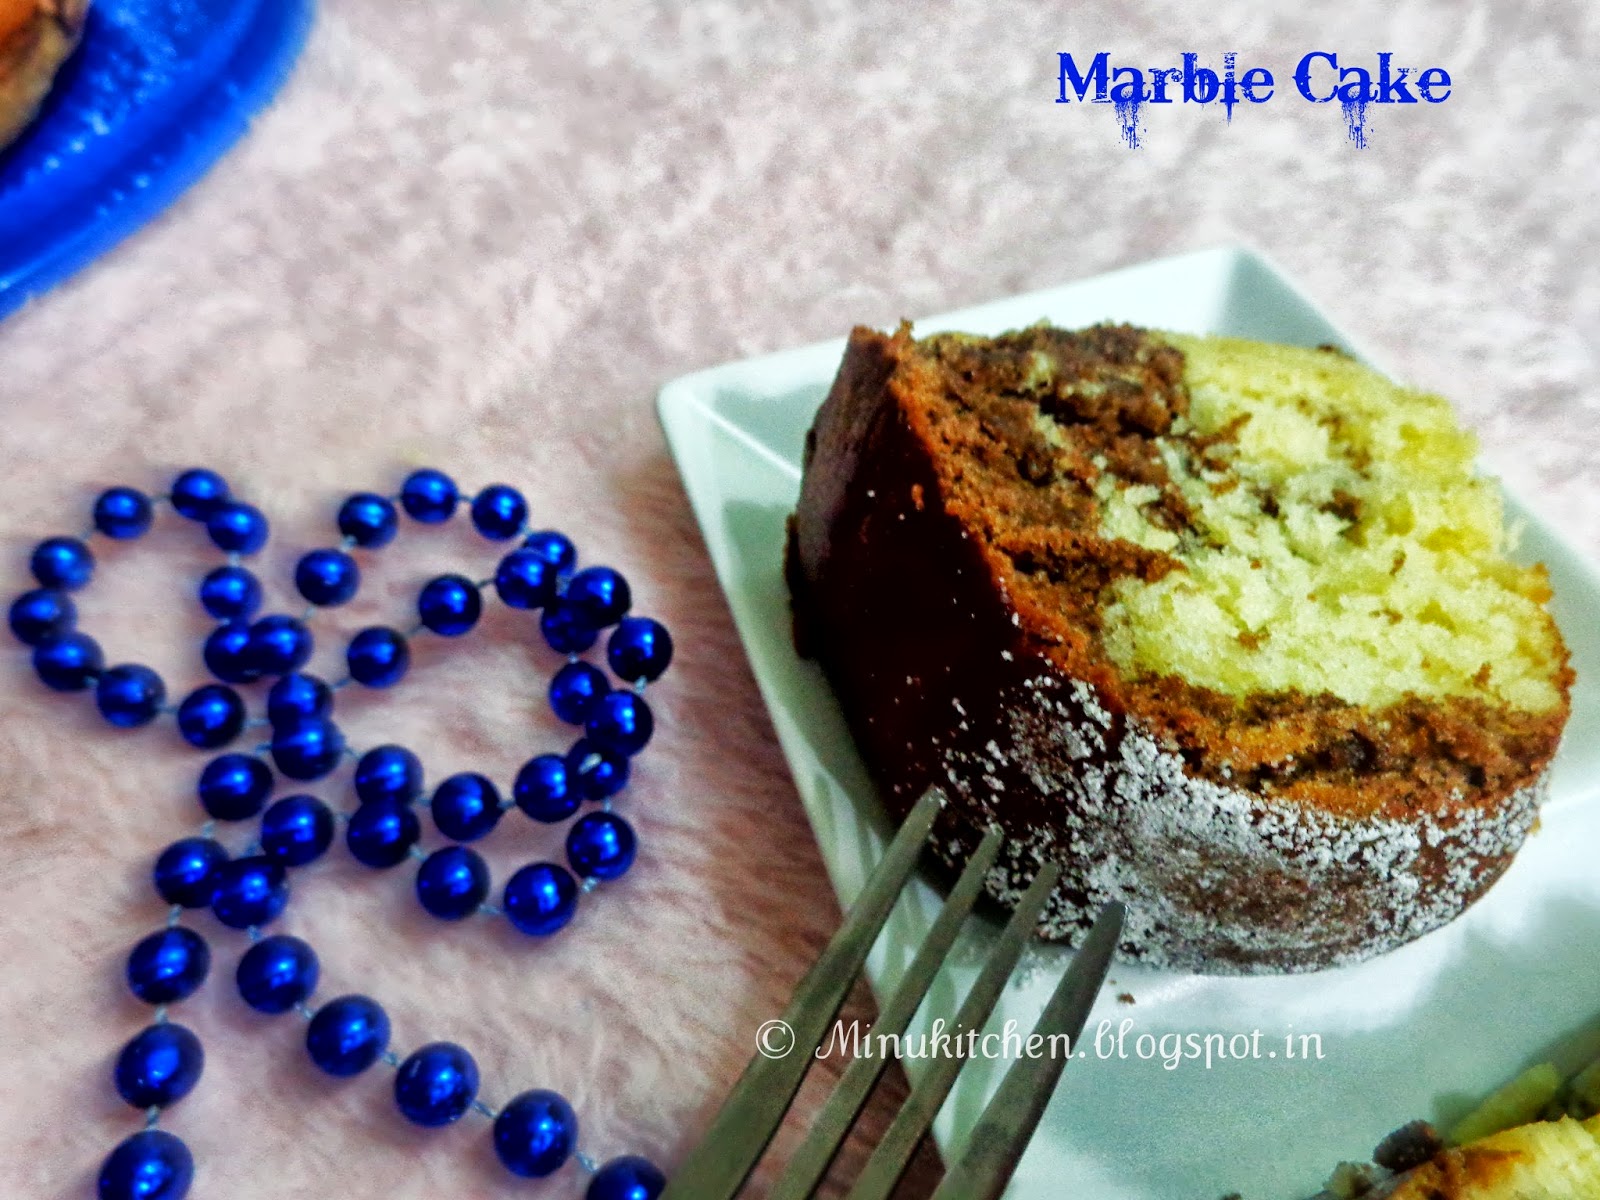
As I said, the making is very simple, I have given the collage only for assembling the cake.


Ingredients:

  • All-purpose flour – 1 Cup
  • Baking Powder- 1 Tspn
  • Butter, at room temperature- ¼ Cup
  • Sugar- ¾ Cup
  • Eggs- 2
  • Vanilla Extract- 1 Tspn
  • Milk- ¼ Cup
  • Sweetened coconut flakes(available in the baking section in stores)- 1 Cup

For Cream Filling:

  • Icing Sugar- 2 Cups
  • Butter, at room temperature – ¼ Cup
  • Cream cheese at room temperature- ¼ Cup or 100 Grams
  • Vanilla Extract- 1 Tspn
Temperature and Time Duration:

  • Temp:350 degrees F (180 degrees C)
  • Time:25 Minutes

Method:
  • In a bowl mix all-purpose flour, salt, baking powder, sugar, soda and cinnamon and set aside.
  • In a separate bowl, beat the butter at high speed for about 2 minutes and add the sugar and beat again for about 5 minutes or until it turns fluffy.
  • Add the vanilla extract and start adding the eggs one at a time and beat again.
  • Now alternately add the flour mixture as two additions and milk as two additions. Beat until everything is combined well.
  • Fill the cupcake wrappers kept in the muffin cake pans with the batter and bake until the said time. (Step 4)
At this point, you could get a spongy cup cake. Check if a toothpick inserted in the middle comes out clean and the texture would very spongy as below


For the cream filling:

  • Beat the butter at high speed until it becomes fluffy.
  • Add the cream cheese and the vanilla extract and beat again for about 2 minutes and then add the sugar and beat until everything is combined well.
Assembling the cup cake:

After the cup cakes are set cooled completely, add the cream filling on the top by using a spoon/knife.
Garnish with sweetened coconut flakes on top of it and serve.

 
Tips:

"Do not prepare the cream filling at the earliest; make it only after the cup cakes are made so that it doesn’t melt.

Assemble the cupcakes only after it’s cooled completely else the cream filling will melt if it’s hot."

Wednesday, 25 December 2013

I was waiting for a right choice to post this recipe, as I always love the banana bread, this is another version of it but we mix some chocolate here. As today being Christmas, I thought of making a cake which doesn’t need a beater or electric mixer as anyone can make it, as it involves just the mixing and its purely optional for you. And for the very first time at Minu’s kitchen I am posting a cake with a fondant. I always have wondered on some of the Christmas cakes how they make such a perfect fondant, with some funky stuff on it. One of my experimental fondants I have done after a very long time is this. When I say fondant, you can prepare it in many types or you can get it as readymade in many grocery stores in the baking area, but its little expensive; instead you could prepare it at home as it is very simple and easy to make. The variety is the Marshmallow fondant; you can buy these marsh mallows at any grocery stores. They are little cute spongy isn’t it! :) .


Making a fondant is similar how you make dough for any snacks, the consistency should be correct else you cannot work with it. After you make it, you can mix it with any desired food color however make sure to use a branded food color to taste better and gives you a great look as well. I used the Americolor which are really rich and nice. Look at the snowman it’s very easy to make with the fondant and you can make it to any form and use to the cake. It was real fun to play with that but it takes time if you are doing it for the first time.

I did some frosting as well for the cake as part of decorating the cake however everything is optional and your choice, as if you need just the cake or the cake with fondant / frosting or both. The same colors I used for the icing as well. After you make it just put it inside the refrigerator for about 20 minutes to get that consistency, also an important factor while you make fondant cakes is, always choose cakes which is easy and simple as it may take much time to decorate, in that case the chocolate banana cake is the best choice…and that will be the best Christmas cake. I wish all my readers a Merry Christmas


To Make Marshmallow Fondant:
  • Marshmallows- 1 Lbs
  • Powdered Sugar- 2 Lbs
  • Water- 2 Tspn
Method:

  • Sprinkle the water to the marsh mallows and heat it in microwave for 1 minute, at this time all the marshmallows will dissolve, stir continues with a rubber spatula without any lumps in it.
  • Add the powdered sugar and kneed with hand until the dough is formed.
  • After its done wrap with a cover or in a Ziploc and store it in refrigerator.
 

For the Rich Creamy Frosting (If you wish to make):

Ingredients:

  • Butter at room temperature- ¾ Cup
  • Vanilla Extract- 1 Tspn
  • Icing Sugar- 2 Cups


Method:

  • Beat the butter and vanilla extract until light and fluffy.
  • Add the sugar and beat again at high speed. If icing is too thick, add milk 1 teaspoon at a time, to desired consistency.
  • Makes 2 1/2 cups


To Make the Chocolate Banana Cake:

Initial Requirements:


  • Temperature:350 Degrees F(177 Degree C)
  • Time:35- 40 Minutes
  • Pan Used: A 9 inch (23 cm) round cake pan
Ingredients:
  • All-purpose flour- 2 Cups
  • Sugar- 2 1/2 cups
  • Cocoa powder or melted Choco chips- 1 Cup
  • Baking Powder- 2 Tspn
  • Baking soda- 2 Tspn
  • Mashed Bananas (Ripe)- 1 ¼ Cup
  • Vanilla extract – 2 Tspn
  • Warm water- 1 ¼ Cup
  • Milk- 1 Cup
  • Any Oil- 1 Cup
  • Salt- ¼ Tspn


Method:

  • In a bowl, sift the sugar, flour, cocoa powder, baking powder, baking soda, and salt together and keep aside.
  • In a mixing bowl, beat the eggs on high speed for about 1 minute and add the mashed bananas, water, milk, oil, and vanilla extract and beat again for about a minute(beating is purely optional, you can just stir or whisk if you don’t have a beater/electric mixer)
  • Now add the sifted flour to the egg mixture and combine well with a rubber spatula.
  • Pour the batter to the cake pan and bake until a toothpick inserted at the middle comes out clean.


To decorate the cake:

  • Make a sheet out of the fondant by a rolling pin and spread that to cover the cake.
  • You could use the remaining fondant to form as any shape and affix to the cake.
  • With the frosting made you could decorate it at the bottom of the cake like the way I did.

Friday, 25 October 2013

Here is a new variety for you all in my pastries page,for many days I was thinking to post something with orange, but couldn’t get a rite pastry recipe, after long trials, got this one from my baking class book, which I did during my college days. though I couldn’t able to recognize the taste, i tried it on my own, and got the real taste of the shortbread, you can bake this as a cake or even a shortbread as I did. This is a very simple one, easy to bake and tasty to have as well.

All you need is the common ingredients of making a cake and frehly squeezed orange juice and the orange zest(the outer skin of the orange,as it in the below pic), you may wonder why every time I use the outer skin of a lemon/orange in many of my pastries, the reason being it gives a very good flavors of the fruit and tempts you to have more. Make sure to wash your oranges thoroughly before grating and while grating do not grate the white pith underneath, as it adds a bitter taste to the shortbread. After you squeeze the oranges, pour the juice through a fine mesh strainer to remove any seeds or pulp if any.


Initial Specification:
  • Temperature:325 Degrees F(170 Degree C)
  • Time:50-60 Minutes
  • Pan Used: a 9 x 5 x 3 inch (23 x 13 x 8 cm) loaf pan(Butter it and keep it for a while)


Ingredients:
  • Eggs- 5 (Separated yellow and white)
  • All Purpose flour- 1 ½ Cup
  • Sugar- 1 Cup
  • 2 Large Orange squeezed juice.
  • Oil(Any)- ½ Cp
  • Vanilla Extract- 1 Tspn
  • Baking Powder- 1 Tspn
  • Orange Zest- 1 Tspn
  • Cream of tartar(optional)- ¼ Tspn
  • Salt-1/4 Tspn


Method:

  • Mix all the dry ingredients well I,e flour,sugar,orange zest and baking powder(Step 1)
  • Add the oil, orange juice,egg yolks and the vanilla extract to the flour and beat highly for about 2 minutes.
  • In a separate bowl, beat the egg whites in a very high speed until it becomes like foam at high speed for about 4 minutes.
  • Add the egg whites to the batter (Step 2) and mix with a ladle(do not beat)
  • Pour the mixture to the loaf pan(Step 3) without any lumps.
  • Bake it for the said time and transfer to the wire rack and set it until it becomes cold.

Before serving, you can dust the bread with the icing sugar however its purely optional.

Friday, 4 October 2013

I know I have nt posted anything new for long time on my pastries page, as I couldn’t get much time for my baking :) . Each time I think to do that, but ended with something else, this time even my Bf was anxious to have my pastry.. So, after a long time, inspite of my schedules,I found a time for baking, the reason why i am saying this is, the muffin which I made is for those who are really in the race and not getting time for baking, as this is really an easy one, and you don’t have to use any electric mixers. All you need is a whisker or just a ladle to mix the dough.The key ingredient for this muffin is the apples and carrots, so grate it to tiny if you can by a food processor or by manual grating.


At my home, everytime I end up with wasting carrots,so was just thinking to make something out of it, and this flashed into me, when I visited some pastry shops here. Not just the carrots, I have also added few grated apples, which added a extra taste to the muffins.


A muffin (American-style muffin in the UK) is a type of semi-sweet cake or quick bread that is baked in portions appropriate for one person. They are similar to cupcakes, although they are usually less sweet and lack icing. You could also do some icing if you wish else, you can serve it without anything on top of it,as I like that way :) Here you go.. Enjoy your weekend !


Ingredients:
  • All-purposeflour- 1 ½ Cups
  • Grated raw carrot-1 ½  cups
  • Apple- 1 Grated
  • Sugar- ¾ Cup
  • Cinnamon powder- 1 Tspn
  • Eggs- 2
  • Any Oil- ½ Cup
  • Vanilla Extract- ½ Tspn
  • Baking Soda- 1 Tspn
  • Baking Powder- 1 Tspn
  • Raisins- ½ Cup
  • Salt- ¼ Tspn


Method:


  • In a bowl mix all purpose flour, salt,baking powder,sugar,soda and cinnamon and set aside (Step 1)
  • To the flour add the grated apple and carrots and mix well (Step 2)
  • In a another bowl, mix the egg with vanilla extract,oil and whisk well (Step 3,4)
  • Add the wet mixture to the dry and mix well (Step 5).
  • If you have a ice cream scooper, use that to fill in your cup cake holes (reason being, if you take a scoop that will suffice for the complete muffin else it may over flow and the shape will not be proper) (Step 6).
  • Set into the oven, and after its baked, transfer to the wire rack and serve after its cooled completely.
If you wish to make it such a way with the folded design at the end like how I did, all you need is a cup cake wrapper, I used the plastic(Oven safe) wrapper.After you all done, just prick the sides of the cake by the toothpick and it comes out without sticking in it.


Friday, 2 August 2013

No wonder that everyone loves to have Jam with bread, but don’t you think its boring for you to taste the same jam which you are getting it from shops?? Why not try it at home?.. It may sound tedious but it’s absolutely not. Make a try and it’s a best way to surprise your family by making Raspberry jams at home. It’s very quick to do, say less than 15 minutes to get a perfect Raspberry Jam. It’s great to have with shortbreads, cookies, tarts, pancakes and waffles. All you need is the key ingredient I,e Pectin. For some of them I know it’s a new term but it’s available in most super markets and grocery shops where you could get baking items.


It can be either as like bottle below or can also be available in packets; this is used to thicken the jam. It is naturally found in fruits but since the amount can vary depending on the fruit we are using it here, also it would need a acid combined with it and hence we are using lemon juice but in tern it gives a nice flavor as well to the jam. And the most interesting fact is Raspberry jams are widely used in making many cookies and cakes, that is also one of a reason why I wanted to post this for my readers :)


Ingredients:
  • Fresh Raspberries or Frozen Raspberries- 2 Cups
  • Sugar- 1 1/2 Cups
  • Pectin-1 ¼ Tspn
  • Lemon Juice- 1 Tspn


Method:

  • In medium heat, cook the raspberries and add the sugar, pectin to it and stir continuously, in few minutes it will start melting for about 5 to 10 minutes.
  • You will notice large bubbles and the jam will start thickening.
  • After boiling for another 5 more minutes, the color of the jam will also start darkening.
  • You can remove now from heat and add the squeezed lemon to it and let it cool completely.
  • After the jam gets cooled down, refrigerate for a day and you can start using it a day after it.


Tips:
"You can filter the jam after its made if you don't want the seed in it, however with seed it will give you the exact taste of the jam

You can replace the raspberry with any other berries as well say with strawberry also you can make it with the same process"

Tuesday, 25 June 2013

I seriously fall in love with these jams packed sandwich cookies!! Jam Sandwiches are a buttery, sweet treat made by pressing two cookies together with (you guessed it) jam. It has a unique taste as it is packed with jam at the center. Anyone would definitely like these cookies especially the kids. Perfect for celebration or a vacation time.The making of the cookie is very easy however the most time takes when you are assembling it. The most important factor in making this cookie is the dough as it should be hard enough and not soft. So, to make it hard, you need to keep the dough in refrigerator at least for 45 minutes, or you can keep the dough for 2,3 days and can make it when ever you want.


I made these cookies stuffing it with fruit jam, which adds extra taste to the cookie. You can store these cookies in the air tight boxes for a month also however stuffing the jam in the cookie should be done only when you are going to serve them, as it may make the cookies crispy.My BF really enjoyed it and so, are you ready to treat your dear ones!! :)


Ingredients:
  • All purpose flour – 1 ½ Cup
  • Almond Powdered- 1 Cup
  • Ground cinnamon – ½ Tspn
  • Lemon Zest(refer basics of baking)- few
  • Vanilla extract- 1 Tspn
  • Butter – ¾ Cup
  • Sugar – ½ Cup
  • Eggs- 2
  • Salt- ¼ Tspn
Topping:
  • Jam- 1/4 Cup
  • Icing Sugar-1/4 Cup


Initial Requirements:
  • Temperature:350 Degrees F(180 Degree C)
  • Time:25- 30 Minutes
  • Pan Used: Cookie making pan wrapped with parchment paper or a wax paper.
Method:

  • Mix the all purpose flour,ground cinnamon,lemon zest and keep aside (Step 4)
  • Beat the butter in medium speed for a minute (Step 1)
  • Add sugar to it and beat again for 2-3 minutes (Step 2)
  • Add vanilla extract and the egg to it and beat again for a minute (Step 3)
  • Add powdered almond and the mixed flour to it and beat for about 2 minutes, do not beat for long time as it may loosen the dough.
  • Work with the dough just like making chappathi dough with a rolling pin, and spread it flat and roll it with a plastic cover and keep it in refrigerator
  • for about half an hour to tighten the dough.


Assembling the cookie:


  • If you find the cookies are becoming soft while, placing them in the baking sheets keep it back in the refrigerator for about 10 minutes to chill the dough. This will prevent the cookies from spreading and losing their shape
  • Once the dough becomes hard, flatten it again using your hand gently, care should be taken as it may break into pieces.
  • Cut the cookies by using the heart shaped cookie cutter for some of the cookies.
  • Use a smaller cookie cutter to cut out the centers of half for rest of the shaped cookies
  • Place both the cookies in the pan, wrapped with parchment paper.
  • Bake it for about 30 minutes or until the sides becomes brown.
  • Place the baked cookies on a baking sheet and dust the tops with icing sugar.
  • Spread a thin layer of jam on the bottom surface of the full cookie (top of cookie will face out).
  • Place the cut-out cookie on top and gently sandwich them together.
  • Using a spoon fill the cut-out with a little more jam to cover the hole.


Friday, 17 May 2013

Imagine a cake which has both the chocolate and the vanilla flavor!!! Irresistible is it??? Of coarse yes, especially when you make it for your family and friends to treat them. It’s rich in taste and perfect cake to serve with hot coffee. Before I go into the recipe, thought of sharing you some of the interesting history about this cake, The idea of marbling two different colored batters into a cake originated in nineteenth-century in Germany and it remained popular throughout the 19th and 20th centuries. Originally the cakes were marbled with molasses and spices, later many Jewish in 1970’s added an amount of almond extract to it and named as “German Marble Cake”. Interesting is it!!! So, here you go with the making part.


The most important factor to make this cake is the pan used I.e. a tube pan to bring the shape and its perfect to arrange the batter to differentiate the vanilla and chocolate part in it. It tastes great as we prepare the batter to rise until it becomes fluffier and the unique ingredient used in it is the yogurt. You could replace it by using a sour cream as well. It may look like the method is difficult by seeing, but its absolutely not, and you can make it quite often at home. Marble cakes are served by dusting its top by icing sugar. You can store the cake up to a week for serving as well. When I made this marble cake my BF really enjoyed having it and thanks to my new friend “Irum” for the wonderful feedback and glad that she really liked it. My Best wishes to make her own :)


Ingredients:
  • All purpose flour – 2 Cups
  • Sugar- 1 ¼ Cups
  • Eggs- 2
  • Chocolate powder – 100 Grams
  • Yogurt- ½ Cup
  • Vanilla Extract- 1 Tspn
  • Baking powder- 2 Tspn
  • Baking Soda- ¼ Tspn
  • Butter- 150 Grams
  • Milk- 1/4 Cup
  • Icing Sugar- ¼ Cup
  • Salt-1/4 Tspn


Initial Requirements:
  • Temperature:350 Degrees F(177 Degree C)
  • Time:25- 30 Minutes
  • Pan Used: 10 inch (25 cm) tube pan
Method:


  • In a bowl, mix the all purpose flour, baking Soda, Baking powder and salt and keep aside
  • Stir the chocolate powder with hot water and keep aside(Just to make a chocolate cream)
  • Beat the butter at high speed for about 5 minutes until it becomes fluffy (Step 1)
  • Add sugar to it and beat again in heat speed for about 5 minutes until it becomes as shown (Step 2 & 3)
  • Add one egg at a time and beat at regular intervals until it rises nicely(Step 4)
  • Alternately add the mixed flour mixture,the milk and the yogurt to the batter, in three additions at the beginning and ending with the flour (Step 5)
  • Now, remove half of the batter from it and keep it separate- This is our vanilla Batter (Step 6)
  • In the remaining batter, add the melted chocolate and stir well as shown-This serves our chocolate batter (Step 7)
  • Arrange the batter as shown in the picture, one after the other and once after you are done, with a help of a tooth pick make swirls in the batter just to marbleize it (Step 8 & 9)
  • Set into the oven, after you pick from oven, dust the top of the cake with the icing sugar and serve after it cooled down completely.

Monday, 29 April 2013

Anyone will go crazy if see a hot Doughnut dipped in hot chocolate or with a sugar glaze!!. I was surprised to see the doughnut making process in one of the doughnut shop here at US which tempted me to make it at “My Kitchen”! It’s ultimately easy to make tasty doughnuts without a doughnut maker. The only point to remember is home made donuts should be served on the same day or the next day after made as it may turn more soft and non crispy. There are different types in it, like the sugar, chocolate. My favourite is always the plain one. Chocolate donuts are loved especially by the kids.


The most important factor in making the donut is about the temperature of the oil as it should not be too hot or with less hot. As too much of hot will break the donut and doesn’t properly cook the inner part and if the oil is low heat it observes lot of oil and taste bad. You could decorate your doughnuts in what ever way you want it :)

Ingredients:

  • All purpose flour – 2 Cups
  • Sugar- 2 Cups
  • Eggs- 2
  • Ground nut powder – ¼ Cup
  • Vanilla Extract- 1 Tspn
  • Baking powder- 2 Tspn
  • Melted and cooled to room temperature Butter- ¼ Tspn
  • Milk- ½ Cup
  • Salt- ½ Tspn


Chocolate Glaze:

  • Chocolate Powder- 100 Grams
  • Heavy Cream-1/2 Cup
  • Melted hot Butter- 2 Tspn
  • Vanilla extract-1/2 Tspn
  • Icing Sugar- 1 ½ Cup
Sugar Glaze:
 

  • Icing Sugar- ½ Cup
  • Cinnamon Powder-1/2 Tspn

Method:


  • In a bowl, mix the all purpose flour, Ground nut powder, Baking powder and salt and keep aside (Step 1)
  • In another separate bowl, beat the sugar and the egg to high speed for about 2 minutes(Step 2)
  • After it raises, add the milk, melted butter and the mixed flour in 3 additions and beat it again for about 3 minutes just to form dough (Step 3)
  • It forms a sticky dough at this time as shown in (Step 4 & 5)
  • Keep the sticky dough for about 20 minutes.
  • After the said time, work with the dough adding more flours to it to form a thick dough as shown as (Step 6).
Shaping It:


  • Roll the dough with the rolling pin and flatten the dough.
  • With the help of a cookie cutter or with a lid as I used in the picture you can cut the dough to get the shape.
  • Place the dough pieces (after cutting) in the tray spread by the flour.
  • In the hot oil (Oil should be moderate heat) gently drop the dough and flip both sides to cook carefully until its cooked well inside and turns brown.
  • Transfer the Doughnuts to the paper towel and let it cools down.
 

For Chocolate Doughnuts:

  • Mix the ingredients under Chocolate glaze and keep aside
  • Doughnuts should be gently dipped in the glaze prepared after it becomes cool.
For Sugar Glaze:

  • Mix the ingredients under Sugar glaze and keep aside.
  • After the Doughnuts cool completely, dust with the mixed sugar.